

Practical Skills
Testing
I followed this tutorial on the left to achieve a cinematic camera for a very short camera pan in a simple corridor. I was testing lighting, textures, and getting a feel for the task. The video explained how i can create a camera, create a motion for it, and export it as a video or group of images. Now I could confidently say I could do it again without the video.
I was just testing with the whole concept and I came up with this. I very quickly and simply found a texture for the walls, carpet and ceiling. Added very simple lights and added a cinematic camera in Unreal Engine. It looks very simple because I just wanted to get a feel for it. When making it for real there will be a lot more detail when needed. I get an eerie felling from this.

Tactile paving
I made these simple Tactile paving just so the floor didn't look so plain. I made a flat cube in Blender and beveled a cylinder. I copied and pasted the Cylinders to match with the texture. I exported it to Unreal Engine and copy and pasted it 8 times to make a floor piece.
Clock
I made this clock in blender to go on the wall of the subway, i textured it in Unreal Engine. I also modeled The clock hands and make cinematics to make them spin. Giving an eerie look to the clock. Below is The blueprint I made to make the arms spin. I added sound effects from soundly (sounds below).


This tells the whole node to play when the player starts

This makes the cinematics playable.
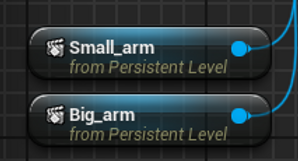
This is the pre-made cinematics for the arms. (them spinning)

This makes the cinematics play over and over again.

Screenshot of My subway halfway through.
Piano Sounds
Me and my dad made some piano sounds, for the horror parts.

Posters
When thinking of posters to put in the subway I wanted creepy. I found the image of the house and made the white text. After getting these into Unreal Engine I realized they are too stereotypical for horror. So I went for UK public service announcements (see below). I think these work a lot better, they are creepy but not scary, so perfect for what I'm looking for.


Making the Creature

I used Mudbox 2022 (Autodesk) to make the monster. I used the template of a human body and sculpted and stretched it to form this deformed monster. I exported it as an FBX file.

I used the exported FBX file to import into Blender and added a matt black texture, I also added matt white dead eyes and also sharp bloody teeth. I think this works well for my theme.
I used Adobe Mixamo to rig the Monster and use the free animations and downloaded them, then I got them into Unreal Engine so i can use them in my game.

Arcade Machine


I made this Arcade Machine for my Crazy Golf level, I had a big area that needed to be filled so I thought to add a little Arcade Game area. It fit with the level design I'm doing as well. I made the model in Blender, I used an image texture for the screen (Space Invaders or something similar, Pac-Man, outrun). The images are in order of what stage I am with making them, the bottom one is the arcade machine in the level.

Crazy Golf Level

Above is a screenshot from when I was modeling the crazy golf level, below is where I am up to now (just under halfway through).
Level 1 and 2 walkthrough
Getting Different sounds for walking
In my game I have different levels, the first being a flooded subway and the send being a carpeted floor crazy golf course. Obviously, I didn't want the sound of going through the water when walking on the carpet. I followed this tutorial on the left to help. Instead of having the water sound connected to the walking animation. I made a sound cue with both sounds and made it so when walking on one texture it plays one walking sound and another sound when on a different texture.


C Key To Make Comments

To make most of my blueprints look cleaner/tidier I selected parts into groups and pressed the c key to make a comment. So I can go back and understand what I'm looking at if something goes wrong. The image on the right is a screenshot from one of my first Unreal Work projects (Cyber Streets - Group Work). You can see how chaotic and untidy It looks. Looking back at it now i would have to look at the names of the nodes to tell me what is what.

Retro Gas Station

For this level I wanted it to be snowing. So I needed to add a snow texture to the floor. I tried just a flat texture but it didn't look the best. Obviously, it didn't show the height of the snow in places so I followed a tutorial on how I can make a 3D texture (Tutorial below).

This is a screenshot with the 3D snow texture and a retro gas station i made. I made the gas station in Blender and got the textures from textures.com. I used Images and modelled them around them to form the pumps. I made the sky completely black and added fog to make it look more creepy. I went through many different textures for the gas station shelter


In this screenshot is me making the snow particle system. I followed a tutorial (see below).
Above is just a video showing the snow I made.
Level 1, 2 and 3 walkthrough
Soft Play Floor
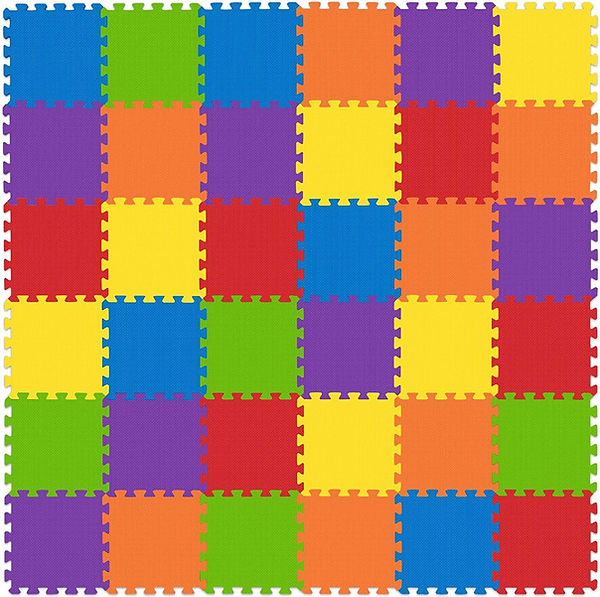
For the soft play center, I wanted to have children's interlocking floor mats. While looking for a seamless texture for one though I couldn't find one so I had to make my own. I followed the photoshop tutorial video below on how to do it. The image on the left is a top-down image I found of some mats and the image on the right is the seamless texture I made. I will be using this in my game.


Testing Soft Play


Above are two very early on screenshots of my (final) soft play level, I have progressed a lot from this point but it's very interesting looking back at where it started. I have built more and more onto the stucture.
Soft Play Slide

In my soft play level, I wanted to have a slide. The image on the left is from a place called "Boomerang Family Play Centre" I went there when I was younger and it has helped me to make some of assets.


Ball Pit
This is a video of me testing the physics on the ball, I was making sure I can move it about ok. Doing this told me the physics were fine. Luckily in unreal engine 4.27, there is just a check box for physics. This meant I didn't have to do any blueprinting to make the ball pit work.
This is a video of the finished ball pit. I have added more balls since but apart from that it was not changed since. From the testing video from this one I have sized down the balls and made them colour full to match the environment. I have also made a pool that the balls can go into.
Train

In my Soft Play level, I wanted to add a small train going around on a track going in a circle. I had modelled this train in the past so I just scaled it down and made some tracks. As you can see I also added a light to the front because the level is going to be dark/foggy.


While making a spline track for my train to follow I had the main problem, as you can see from the videos above the train wouldn't rotate when turning. I followed a video to help me and I went through it time and time again and I couldn't find out what was wrong. It turns out the purple connecting line on the left image wasn't connected. this means the rotation wasn't being changed.
Above is the finished train, I added two different sound effects to the actor so it would follow the train around. For the track, I modelled a straight track and a curved track. I imported them into an unreal engine and made a track, made the train's path go over the track.
VHS Overlay
The video above is a VHS overlay (video on the right), I followed a youtube tutorial (video on left). I am very happy how this tuned out, I also added a VHS static sound effect to play the whole time (sound player above). Below is a screenshot of the blueprint. I'm really happy how this tuned out.

Sitting Jumpscare

The video above shows one of the many jumpscares I have in my game. it uses two animations. They quickly switch places when the player enters the trigger box, this is how the head turns. The open cinematic on the left shows the key frames for the switching animations. The image above is the blueprint that makes everything work together.
